The guide · Porcelain filter

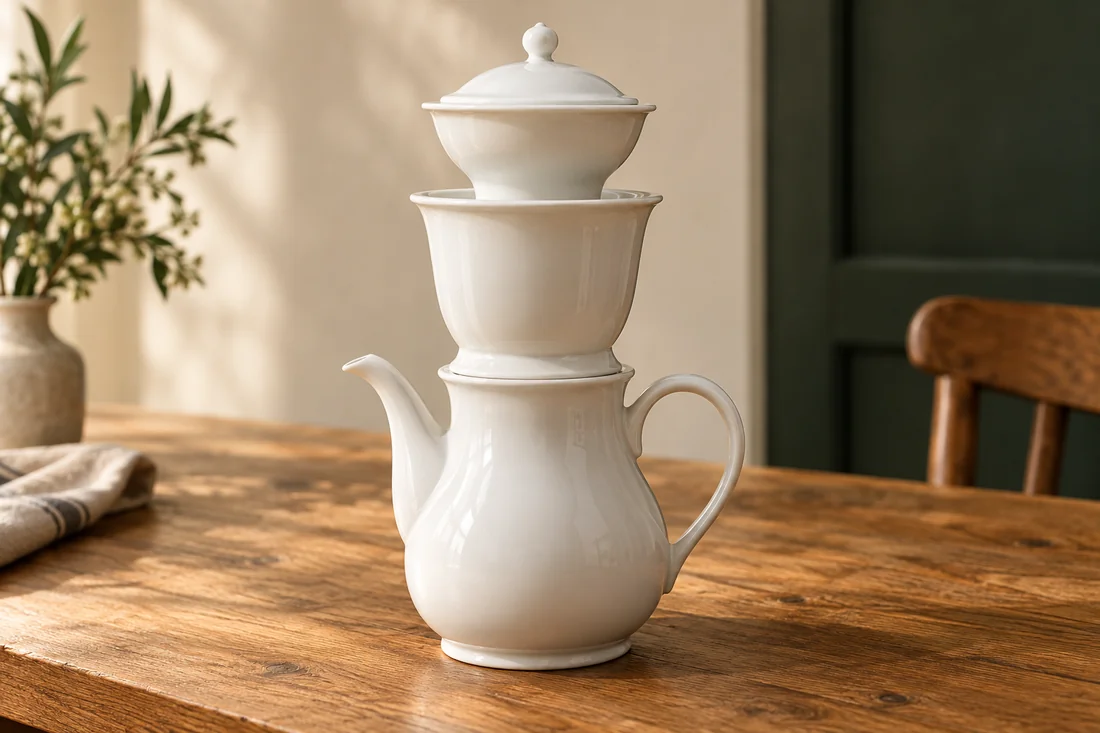
Karlsbad coffee pot

Porcelain filter without paper: pour gently and watch the grounds.

Recipe, techniques and troubleshooting. All on one page.

Porcelain filter — illustrative image

Your starting recipe

Your cup starts here.

A starting point for your beans and your taste.

First trial
30 g Coffee / 500 g Water
Filter
fixed porcelain filter
Grind setting
rather coarse
Quantity
only if suitable for the pot

Quantities adjust in the steps too. Do not simply scale brewing time and grind; observe equipment size.

What you need

Have these ready.

Tick off what is ready. You can start at any time.

Now it is time to make coffee

How it works.
Step by step.

Get an overview first. Then work through each action at your own pace.

First trial
30 g Coffee / 500 g Water
Filter
fixed porcelain filter
Stopwatch00:00

The stopwatch starts only when you tap Start. It continues counting across page changes if your browser allows storage. No alarm.

Understand the technique

Has preheating water been removed?

Karlsbad coffee maker: Preheat the porcelain – illustrated techniquePreheat the suitable porcelain parts with warm water, then discard it.ARinse water out

A · What to observePreheated porcelain parts are emptied before brewing.

Set out the parts
100 %

You start the motion. A shortened illustration, not a brewing timer.

01

Step 1 of 5

Preheat the porcelain

Preheat the suitable porcelain parts with warm water, then discard it.

Understand the technique

Does the bed stay loose on the porcelain sieve?

Karlsbad coffee maker: Add the coffee loosely – illustrated techniquePut the coffee in the designated brewing attachment. Level it loosely without compacting it.ALoose, no pressure

A · What to observeLoosely added coffee is levelled without pressure.

Do not compact
100 %

You start the motion. A shortened illustration, not a brewing timer.

02

Step 2 of 5

Add the coffee loosely

Put the coffee in the designated brewing attachment. Level it loosely without compacting it.

Help with this step

Do not put pressure on the porcelain filter.

Understand the technique

Does the first pour reach all the grounds?

Karlsbad coffee maker: Wet the coffee bed – illustrated techniqueWet the grounds with a small portion of the weighed brewing water.AFully wet

A · What to observeThe small water portion wets the bed.

Observe the drawdown
100 %

You start the motion. A shortened illustration, not a brewing timer.

03

Step 3 of 5

Wet the coffee bed

Wet the grounds with a small portion of the weighed brewing water.

Understand the technique

Does water spread without overflowing?

Karlsbad coffee maker: Continue pouring in portions – illustrated techniqueContinue pouring in manageable portions through the intended water distributor. Watch the fill level and flow.ARoom below rim

A · What to observeThe distributor directs portions onto the bed with space below the rim.

Watch the fill level
100 %

You start the motion. A shortened illustration, not a brewing timer.

04

Step 4 of 5

Continue pouring in portions

Continue pouring in manageable portions through the intended water distributor. Watch the fill level and flow.

Help with this step

Watch the fill level so nothing overflows.

Understand the technique

Is the hot attachment placed safely?

Karlsbad coffee maker: Allow the upper vessel to drain and serve – illustrated techniqueLet the brewing attachment drip, then place it on a heatproof surface. Mix the finished coffee before serving.AWait for drainage

A · What to observeWait for final drops; then place the attachment on a heatproof surface.

Mix the coffee
100 %

You start the motion. A shortened illustration, not a brewing timer.

05

Step 5 of 5

Allow the upper vessel to drain and serve

Let the brewing attachment drip, then place it on a heatproof surface. Mix the finished coffee before serving.

Help with this step

Place the hot attachment on a heatproof surface.

Schematic movement and illustrative AI images. Animations shorten the action; follow the quantities, wait times and safety guidance in the text.

If the flavour is not quite rounded yet

One change.
A new attempt.

Lots of sediment

Check the filter for damage and grind slightly coarser next time.

Weak despite the same dose

Check that the entire bed gets wet and no water bypasses it.

Why it works

The details behind the recipe.

What defines the method

With the Karlsbad or Bayreuth porcelain method, a brewing attachment sits on top of the pot. Its fixed filter base retains the grounds; the classic design does not use paper. Fine particles can still enter the drink. The mouthfeel may therefore be fuller and less clean than with a paper filter. Assembly and capacity vary by model.

Before use, check the instructions supplied with your pot. They determine assembly, fill quantity and care. The following quantities are a general starting point and must suit your pot’s size.

Before the first pour

Check the porcelain for damage, particularly around the filter base. Loose parts, cracks or blocked openings are no reason to apply extra pressure. Assemble the dry parts once without hot water so you know how they fit. Place the pot on a stable surface and leave enough workspace to lift off the upper section later.

Choose a small quantity that suits your pot. As a calculated starting point, you can use 30 grams of coffee and 500 grams of water, provided your pot is designed for this. This is not a prescribed manufacturer value. Grind coarsely enough for the fixed filter to retain most of the grounds.

A cautious process
  1. Preheat the suitable porcelain parts with warm water, then discard it.
  2. Put the coffee in the designated brewing attachment. Level it loosely without compacting it.
  3. Wet the grounds with a small portion of the weighed brewing water.
  4. Continue pouring in manageable portions through the intended water distributor. Watch the fill level and flow.
  5. Let the brewing attachment drip, then place it on a heatproof surface. Mix the finished coffee before serving.
The grind is particularly visible here

If a lot of grounds end up in the pot, start with a slightly coarser setting and check that the filter is intact. A grinder always produces some smaller particles too. Even a coarse average grind can therefore leave some sediment. A completely clear paper-filter result is not the only valid idea of good coffee.

If the coffee seems weak, do not immediately increase the dose. First check whether much water is bypassing the coffee bed or whether the bed is getting evenly wet at all. Pour steadily in a way that suits the water distributor. Uncontrolled flooding makes repetition harder and can cause overflow.

Assess grind and sediment separately

Keep the coffee quantity the same and change only the grind, by one small step. Record taste and sediment separately. You may prefer a slightly stronger cup with a pleasant mouthfeel even if it looks less clear. Do not judge solely by the bottom of the pot.

Clean and dry

Carefully remove grounds from the openings without damaging them with hard tools. Use only cleaning agents and methods suitable for the product. Let all parts dry completely. Paperless means fewer consumables, but no less attention to care.

Frequently asked

Another question?

Do I need paper filters?

The classic porcelain method is designed for its own filter base. Follow your specific model’s guidance.

Can I brew any portion size?

Only within the intended capacity. Adjust both quantities proportionally and observe the process.

Sources & further reading

Related to this topic

Mouthfeel rather than clarity scores

Compare the porcelain brew with a paper-filter brew at a similar ratio. Describe clarity and mouthfeel separately before choosing a favourite.

Filterwirkungen vergleichen ↗

Your coffee helper

Coffee Bro.

I help you brew, find coffee knowledge and show you what is on the menu. Your questions stay here in your browser.

Local content & guided help · no connected language model